您现在的位置是:首页 > 学无止境 > PHPPHP
在线图片管理功能开发
![]() 管理员2020-03-30 14:03:27【PHP】2174人已围观
管理员2020-03-30 14:03:27【PHP】2174人已围观
简介在线图片管理功能开发
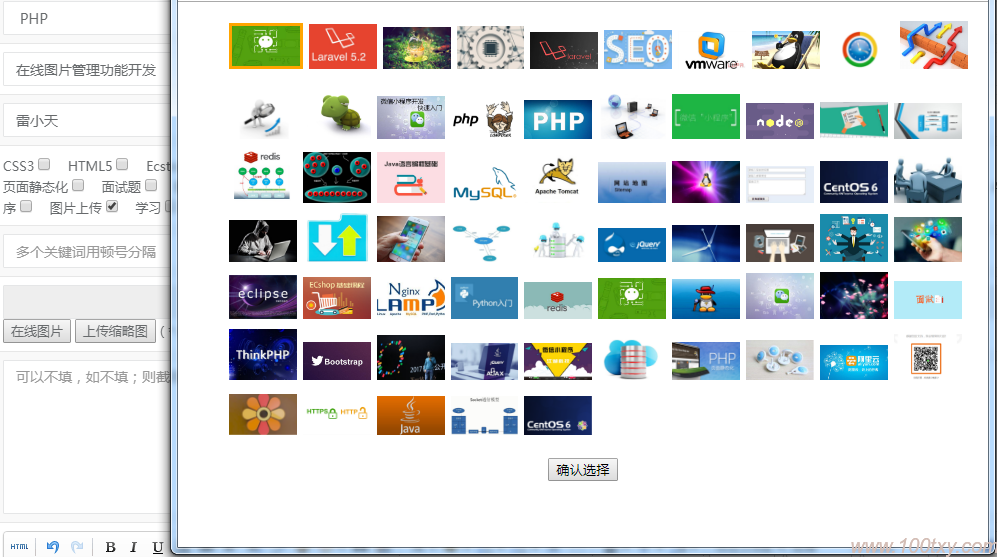
在一些编辑器中我们可以经常看到,多张图片上传功能里面有个在线管理,这个功能是可以选择你之前上传过的所有图片,其实原理是很清晰的,就是遍历出你网站目录所有的图片。今天小编做的这个功能比较简单,只是某个文件夹下的所有图片,这个文件是我存放文章封面图的文件夹,为什么做这个功能呢,就是我在写文章的时候我每次都要从本地,上传一张图片,其实有些图片是可以共用的,封面而已只有不在同一页显示就行了。下面看看我做的效果图吧。

我点击“在线图片”按钮就弹出一个可以选封面的图库,当在点击的时候会有一个被选择的边框效果,最后确定选择就能选择我刚刚选中的图片了。下面来看实际代码吧。
add.html文件
<input type="button" value="在线图片" onclick="centerWindow('__URL__/online','upfile','810','545')" />
  <script type="text/javascript">
    function centerWindow(url,name,width,height){
  var left=(screen.width-width)/2;
  var top=(screen.height-height)/2-50;
  window.open(url,name,'width='+width+',height='+height+',top='+top+',left='+left);
}
 </script>
online.html文件
<!DOCTYPE html>
<html>
<head>
    <meta charset="UTF-8">
    <title>在线图片</title>
    <script type="text/javascript" src="__HOME_JS__/jquery.2.1.4.min.js"></script>
    <style type="text/css">
    .classify-active img{
      border:3px solid orange;
    }
    .cmenu li{
      list-style-type:none;
      display: inline;
    }
    </style>
    <script type="text/javascript">
    $(function(){
     //点击给选择图片加上边框效果
     $("#cmenu").find("li").eq(0).addClass("classify-active");
     var cotrs = $(".cmenu li");
     cotrs.click(function(){
     $(this).addClass("classify-active").siblings().removeClass("classify-active");
    });
    });
    </script>
</head>

<body>
  <div >
    <ul id="cmenu">
      <foreach name="data" item="v">
      <li><img  src="{$v}" style="width:9%;margin:3px;"></li>
      </foreach>
    </ul>
  </div>

  <div style="margin-top:15px;text-align:center;"><button type="submit" onclick="selectimg(this)" class="btn btn-info btn-current">确认选择</button></div>

</body>
<script type="text/javascript">
//开门指令
function selectimg(obj){
  var src=$(".classify-active").find("img").attr('src');
  // alert(src);
  window.opener.document.getElementById('thumbnail').value =src;
  window.opener.document.getElementById('photo').style.display='block';
  window.opener.document.getElementById('photo').src=src;
  window.close();
}
</script>
</html>
其实最重要的还是这段js代码,这段实现把选中的图片url放到input中,并且关闭刚刚打开的窗口
<script type="text/javascript">
//开门指令
function selectimg(obj){
  var src=$(".classify-active").find("img").attr('src');
  // alert(src);
  window.opener.document.getElementById('thumbnail').value =src;
  window.opener.document.getElementById('photo').style.display='block';
  window.opener.document.getElementById('photo').src=src;
  window.close();
}
</script>
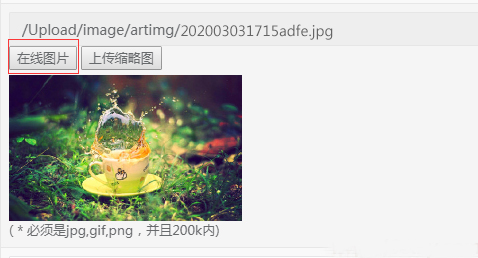
最后看看选中后的效果图


- 版权申明:此文如未标注转载均为本站原创,自由转载请表明出处《小郭博客》。
- 本文网址:http://www.d163.net/html/php/10.html
- 上篇文章:已经是第一篇
- 下篇文章:YzmCMS增加模型时左侧菜单自动添加内容管理
相关文章
最新发表
标签云 更多
-
SAP(1)
奥运会(1)
短视频(1)
杨倩(1)
提拉米苏(1)
大家财险机动车辆保险(1)
王一博(1)
肖战(1)
苏炳添(1)
刘德华(1)
小鹏汽车(1)
高考(4)
阿里云(1)
HR(1)
邓伦(1)
李莎(1)
杜淳(2)
PHP教程(7)
陈好(1)
playhouse(1)
fopen(1)
山村疯狂(1)
第二书包(0)
69乐园(1)
牡丹江民心网(1)
授课到天亮(1)
天天综合(2)
好人岛(1)
符印巨树(1)
男子汉图库(1)
采花小绵羊(1)
涡卷花束(1)
一方嘉通(1)
李心草(2)
半藏森林不带套(2)
王镁幼(2)
嫦娥五号(3)
周冬雨(1)
黄晓明(1)
金鸡奖获奖名单(3)
网页计数器(2)
成都大学(1)
中科创星(1)
马拉多纳(4)
世界互联网大会(2)
porndao(1)
web前端(6)
网站优化(6)
cookie(2)
session(2)
301重定向(1)
headerlocation(1)
百度站内搜索(1)
爱奇艺(2)
爱奇艺弹幕开关不见了(1)
制作网页教程(4)
刘诗昆(1)
react(1)
linear-gradient(1)
旅游网站建设方案(1)
我爱自学网(2)
诺贝尔(1)
笔记(1)
居里夫人(1)
郭德纲(1)
杨紫(2)
蚂蚁金服上市时间(3)
爱琴海(1)
李连杰(1)
陈佩斯(1)
梁静茹(2)
个人网站模板(0)
个人网站制作(3)
个人网站(3)
网页制作(10)
帝国CMS(6)
百度地图API(2)
伪静态(2)
jizhicms(6)
1024(3)
去除bom(1)
Git(2)
中国人民志愿军(2)
麒麟9000(2)
Mate40(2)
新冠病毒(15)
摩天轮(1)
布达佩斯(1)
div居中(2)
新冠疫苗最新消息(12)
新冠疫苗(6)
昆仑饭店(2)
赵丽颖(6)
正面照(2)
石原里美(2)
店员(1)
理发(2)
十几万(1)
伊能静(1)
京东(4)

